Happy New Year! It is good to be home from vacation, over the flu (yuck), and almost back to school (my kids start back tomorrow).
I am ready for a fresh start and have lots of things to improve on this year! Speaking of fresh starts…I have a great project to share, one that needed a fresh start and a new life. My Cubby Shelf Revamp.
As I look at these pictures it makes me miss the warm weather! I made this at the end of summer, a far cry from the snow and ice we are covered in now. I shared it on
My Repurposed Life back in
October.
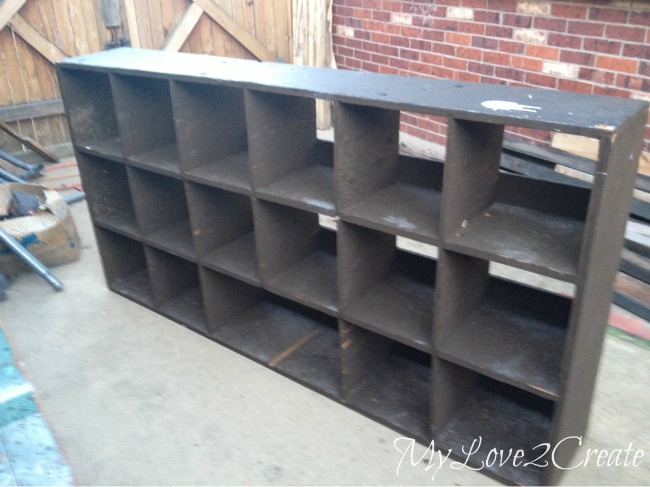
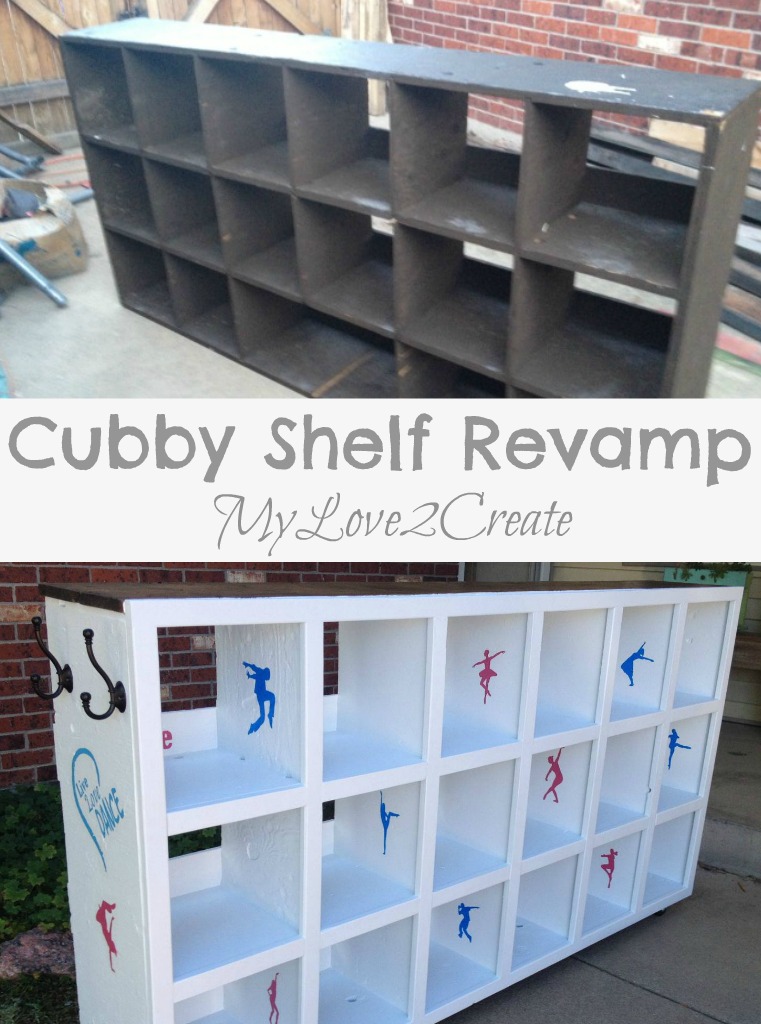
When I first spotted this cubby shelf it was a mess, so I left it sitting by the dumpster. Of course I was kicking myself for leaving it…my junk lovin’ free findin’ self just couldn’t handle it! Within the hour I had my 14 year old in tow and we were headed back to cram it into my van.
Here is a blurry before shot. The wood was pretty water damaged and very dirty, with globs of, I have no idea what, stuck to it in spots. And there was a divider shelf missing on the bottom.
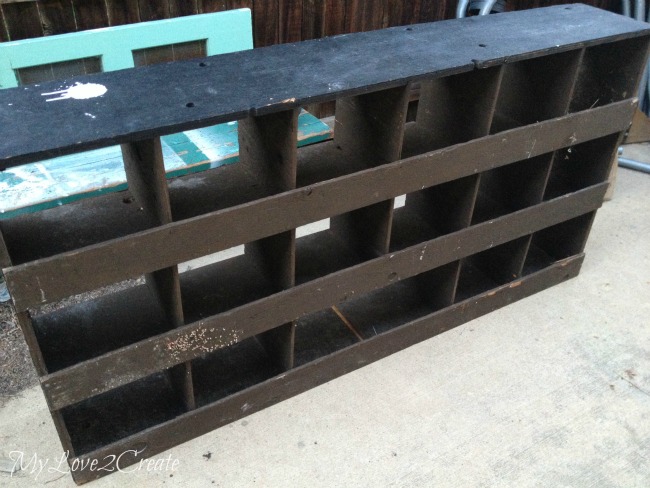
A shot from the back shows the gravel that was stuck to the wood. I did quite of bit of nailing to sturdy it up because it was pretty wobbly. There were random holes drilled in the boards you can see them, I have no idea why they are there but I decided to leave them.
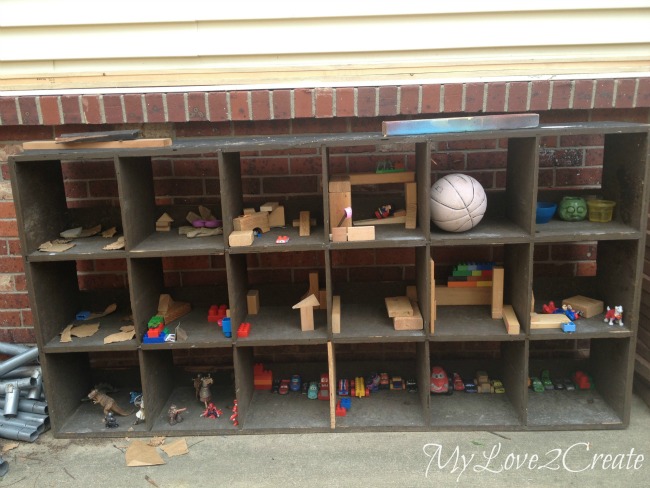
When projects don’t get worked on right away at my house this is what happens. For a few months my kids used it as a huge “doll” house (don’t tell my boys I used the word doll :).
They were pretty upset when I said they had to clean it out! I had decided to revamp and donate this cubby for my daughter’s dance studio as a place for the dancers to store shoes and bags while they were in class. It was time to get to work…
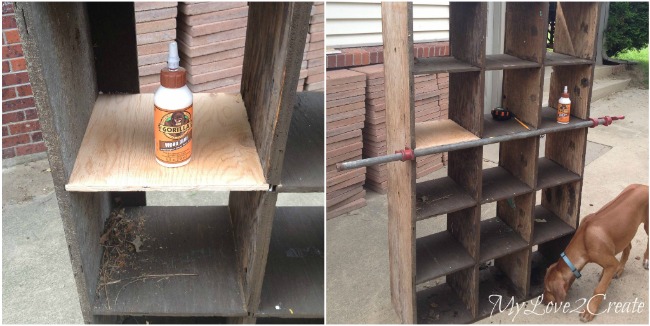
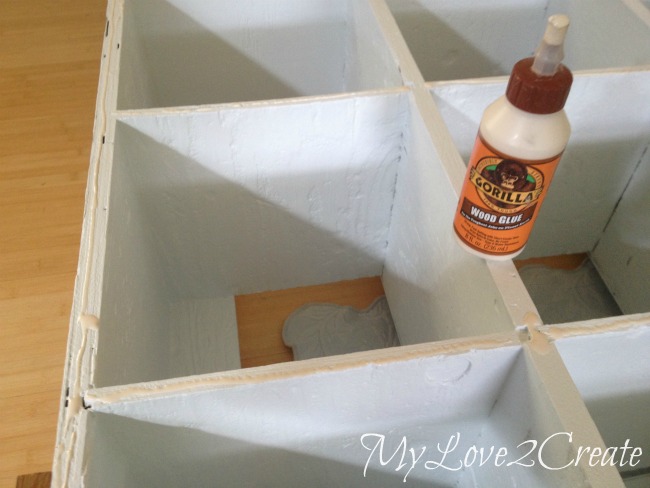
After I had nailed all the boards in place and made it sturdy, I measured and cut a piece of plywood to replace the missing divider. I used Gorilla wood glue and clamped it while it dried. Sunny is always a good helper, except when she helps too much. 🙂 She was so small back then!
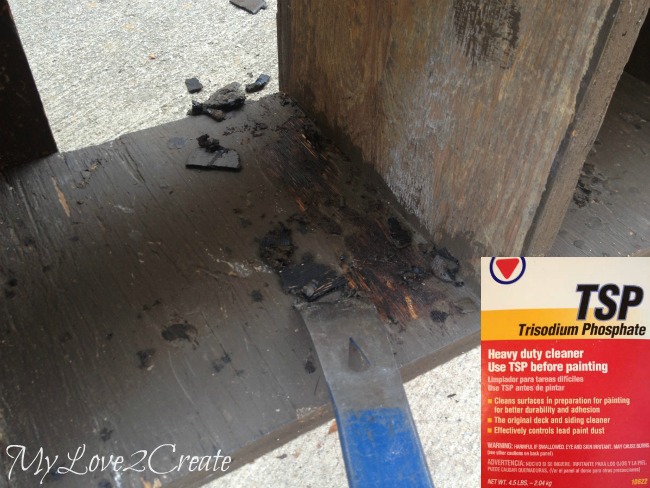
While the glue dried I started scraping off the gunk. I am not sure what this was, maybe tar? It was nasty and I had quite a few cubbies to scrape. When I was done I cleaned the whole thing with TSP a great cleaner that I got at HomeDepot. It took care of any residue so I could paint. I was really impressed with it, since this was my first time using it.
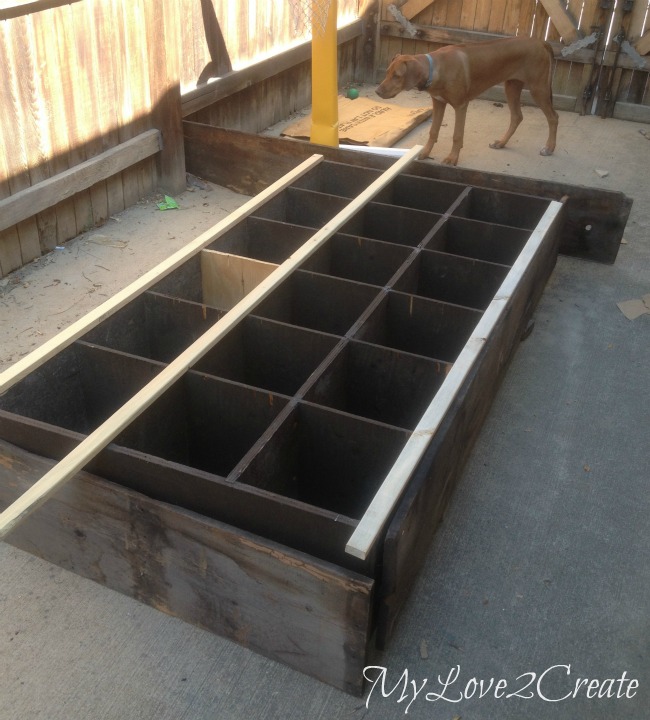
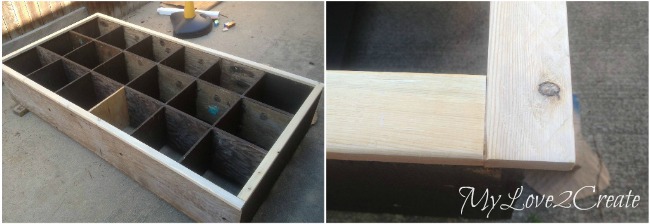
Since it was made out of plywood and water damaged the edges were pretty ugly and rough. So I bought some 1×2’s to make a face frame. I set them to measure where to cut. I also grabbed some old barn wood that an awesome friend had given me, and dry fitted it on the top and sides. I ended up just using a board for the top, and not the sides.
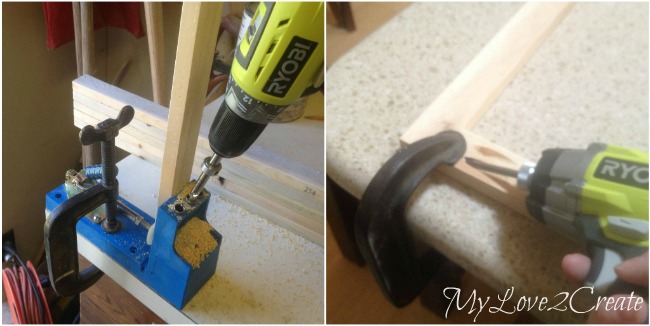
I drilled pocket holes with my Kreg Jig and built an outer frame.
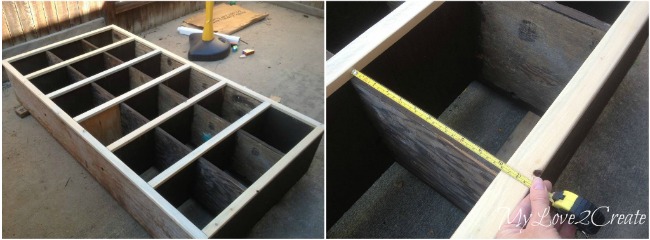
I love how pocket holes work and join the boards flush. Once I had it placed on, I measured for the vertical boards and cut them.
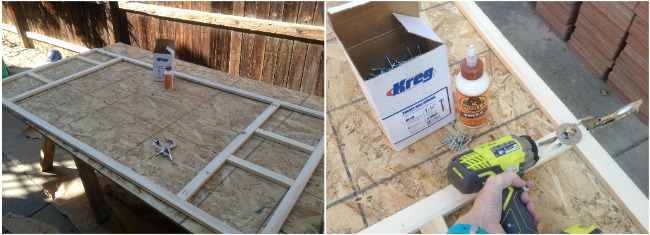
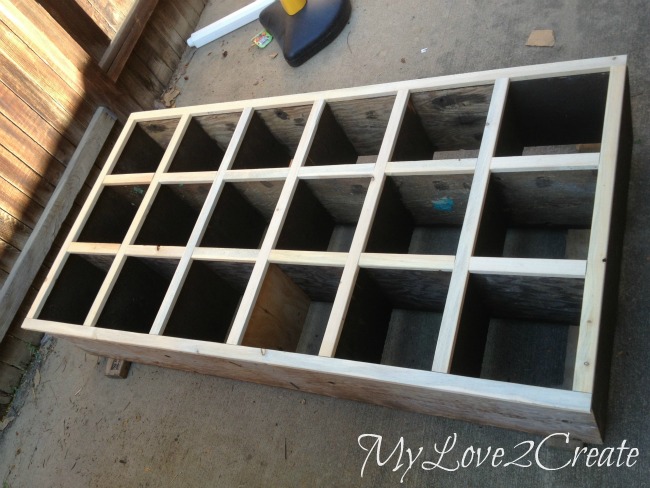
I placed them where they needed to go and then measured for the small horizontal boards. After I got all the boards cut I drilled pocket holes in the horizontal boards.
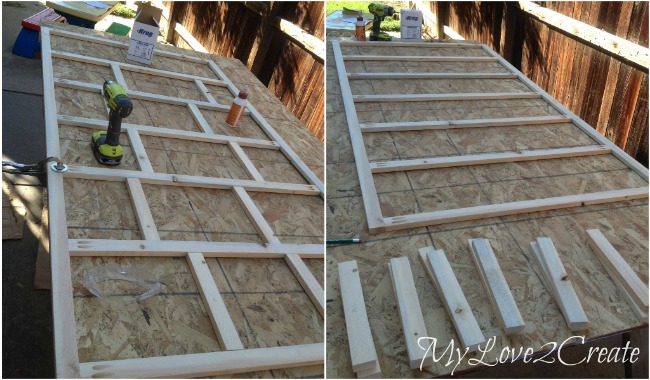
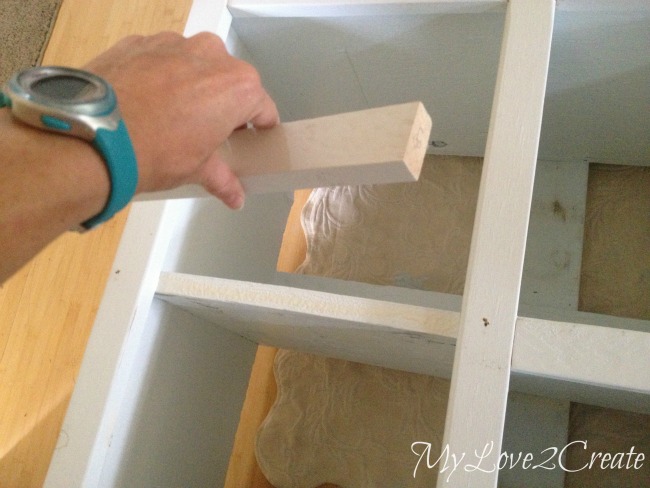
I used the short boards as the spacers to make sure I was placing my horizontal boards in the right place, then I glued and screwed them on, with a little help from my
Automaxx face clamp.
I got them all attached and then removed my spacer boards.
I was so excited I placed the boards on to see how it was going to look. It is amazing the difference trim makes!
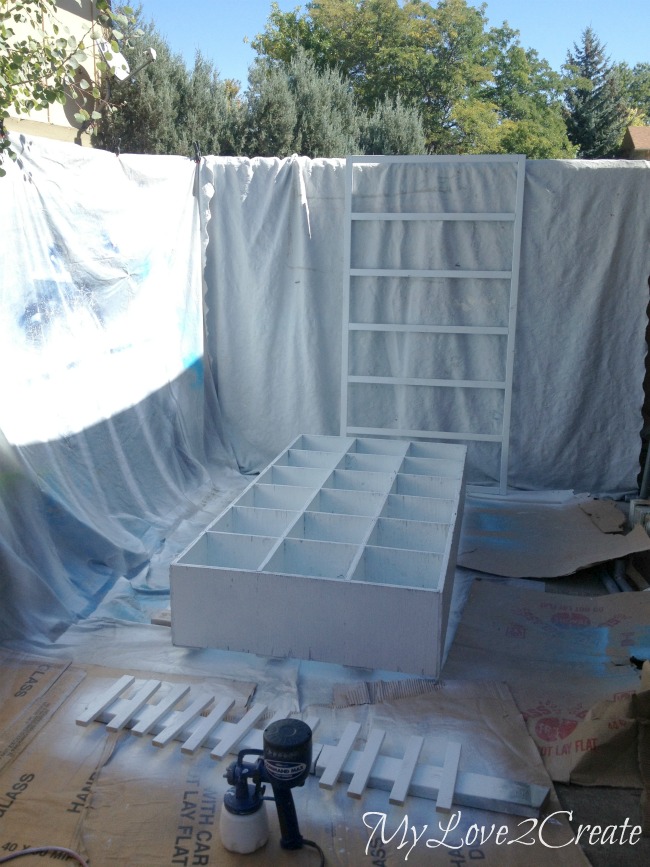
I busted out my command max sprayer to paint and it worked great, but I soon realized my mistake. The warning voice in my head told me I needed to fill all the cracks with spackle before hand, but I stubbornly ignored it. Can you see the cubbies, and how bad they look? The wood cracks were not going to disappear no matter how much paint I used. So I started over, filled in all the cracks and used caulk on the seams. Then I primed.
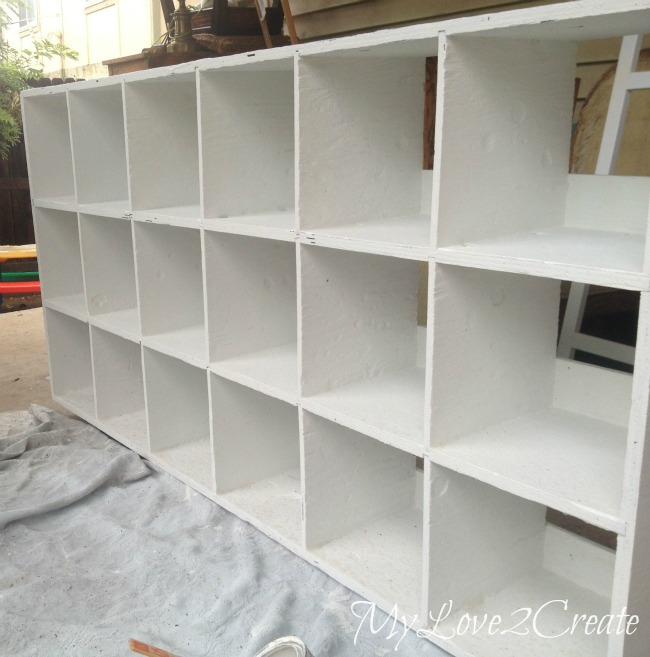
And I painted. Again. The difference is night and day. I had to bring it on my covered porch because it was sprinkling all day, when I went to pick up the kids from school there was a huge downpour and the rain splattered all over it, I had to wipe the whole thing down. Thank goodness the paint was dry!
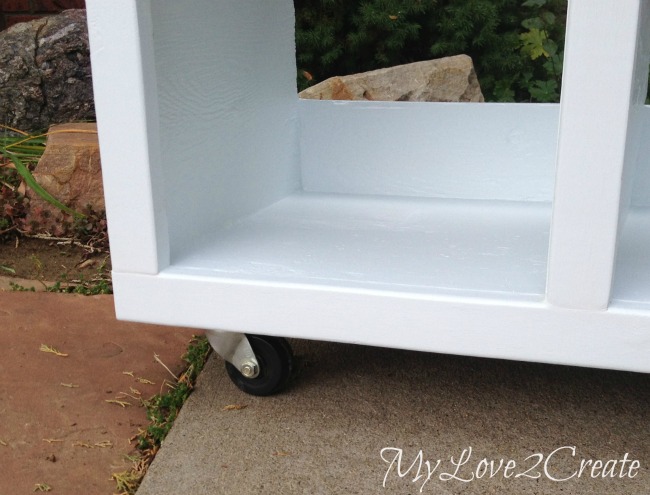
I added some scrap wood and casters to the bottom.
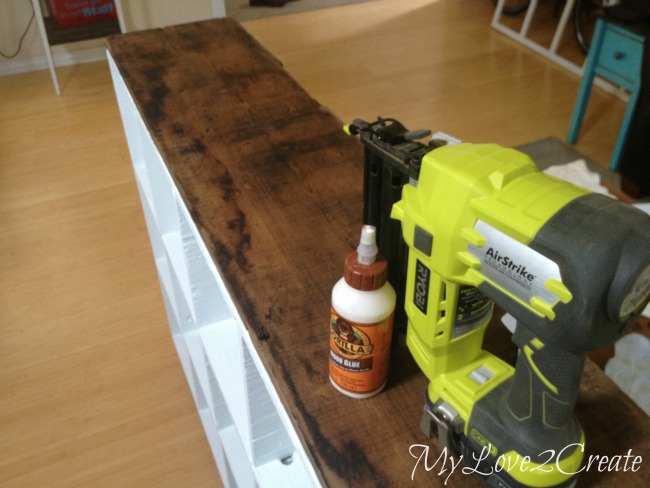
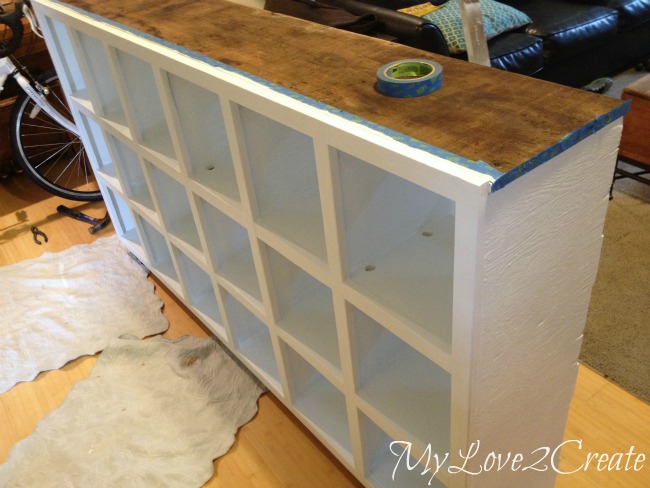
I glued and nailed on the top board. Mmmm, I love 80 year old barn wood.
Once the top board and casters were on I added glue and nailed on the face frame.
Lastly, I added all the small divider boards with glue and nails.
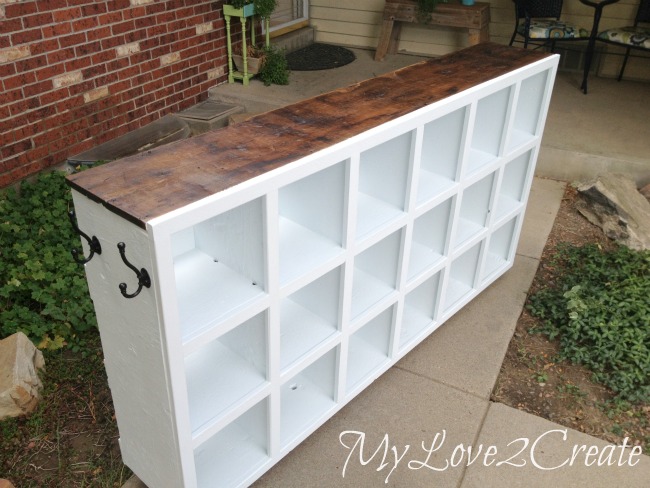
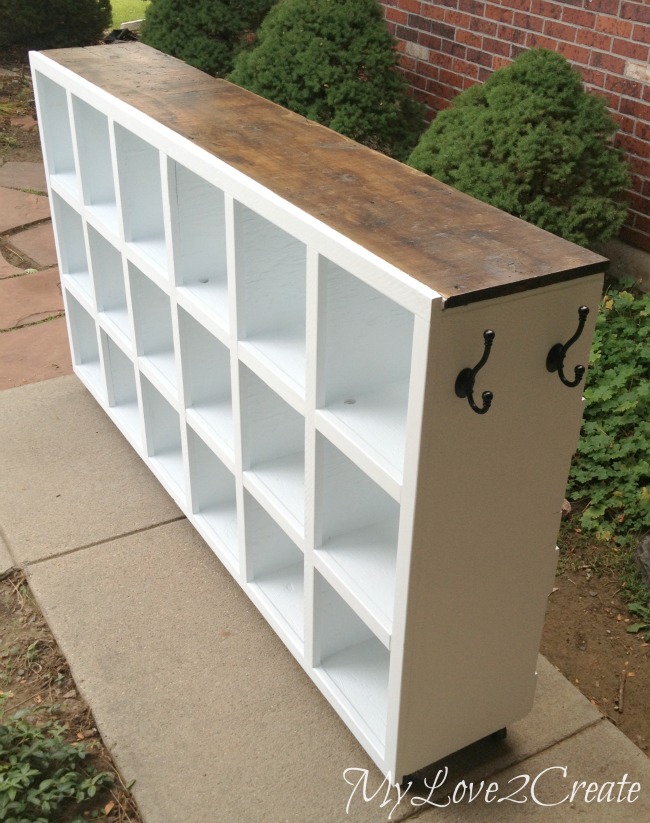
After filling in the nail holes I re-painted the trim. Then I added a few coats of poly to the top wood board and I was finally done!
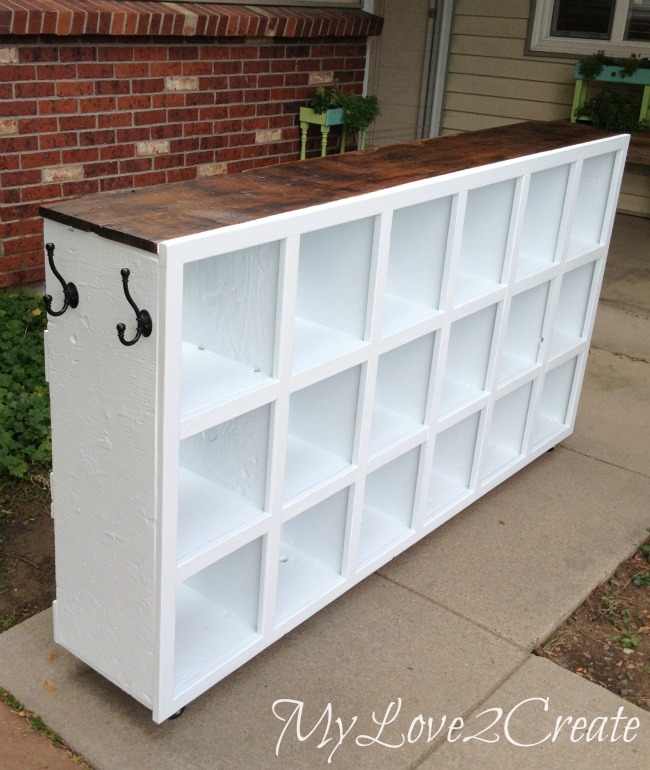
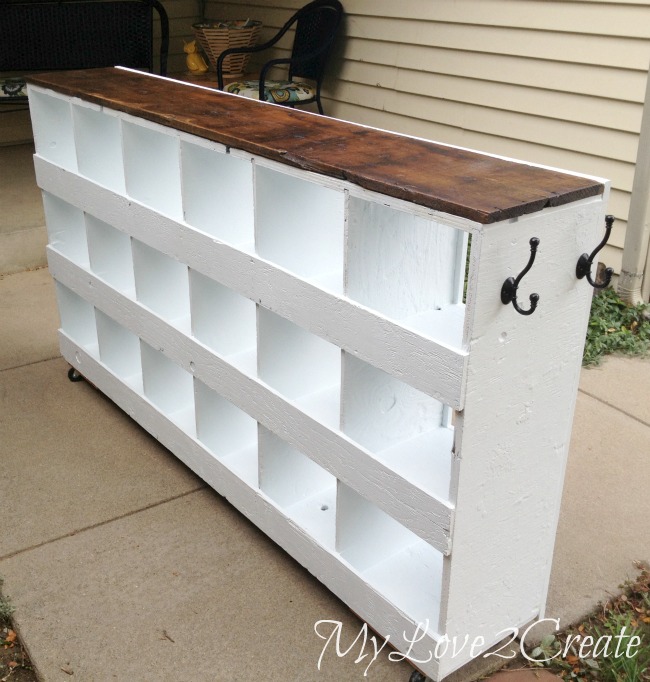
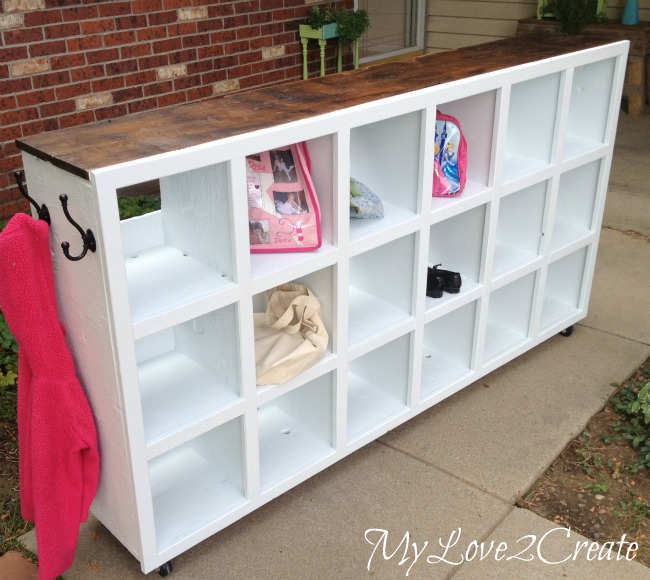
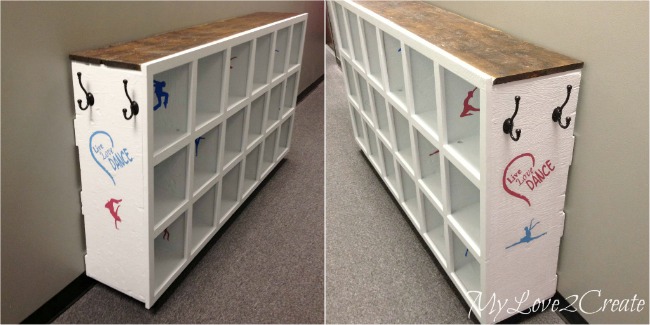
Oh, and I added hooks to each side so the girls can hang coats and bags as well. Can you see some of the holes in the plywood? I didn’t plug them up, I figured there was no need to. They add some character. 🙂
The casters are really nice to have since this is a beast at over 6 feet long. They make it super easy to move.
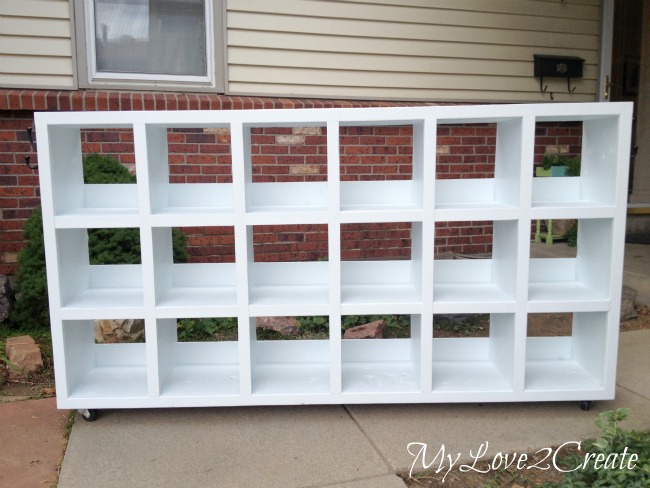
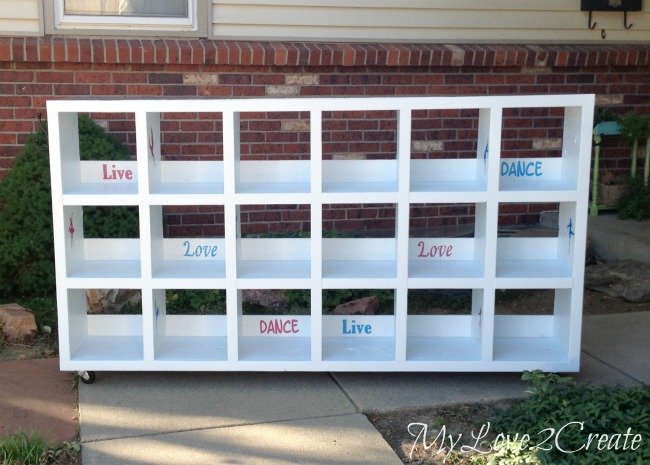
This is the back, it will be up against the wall so I didn’t fill in the cracks.
The front looks so pretty with the trim!
I grabbed some of my daughter’s things to stage a photo, and that is when I decided that it needed something a little more…
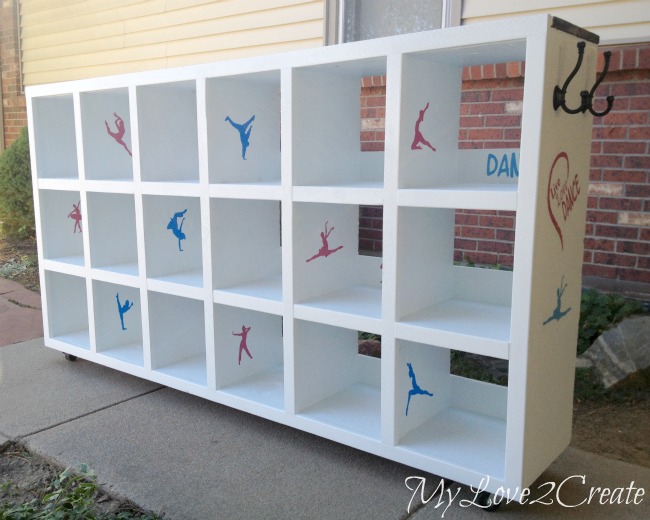
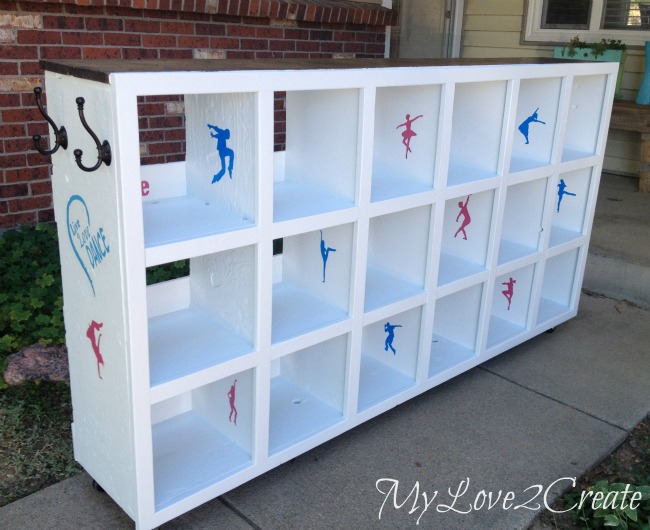
So I added some vinyl dancers for each cubby.
And a little “Live Love Dance” spirit to the piece (the name of the studio).
I sealed all the vinyl with mod podge since the wood was pretty rough, and it was ready to go!
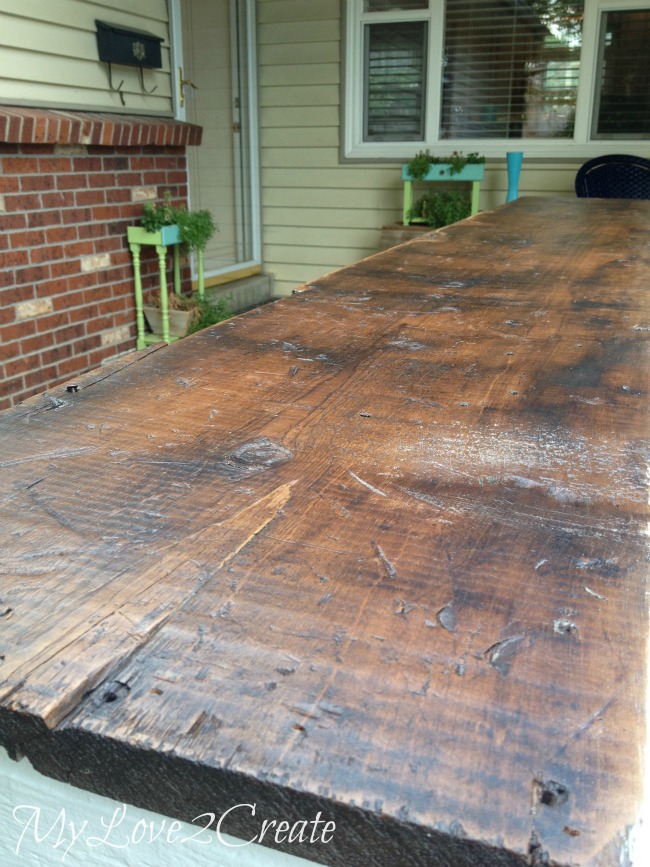
I am in love with the top, so beat up and pretty!
Here it is starting it’s new life in the studio.
I would say this cubby shelf got a great fresh start, and I know the dancers have loved using it. It makes me smile every time I pick up my daughter from dance and see it in use. Ahhh the magic of some good old DIY and TLC!
Hugs!
Mindi
This post contains Affliliate Links.
I will be linking to these parties.



Mindi,
I love the final project–the vinyl dancers really add a lot to this project.
I have updated your post on mrl to add a link to this post.
glad you're home safe and sound, (and well?)
gail
Goodness are you just inspiring!! Not only is that such a find but what you turned it into is beautiful!!! What a great idea Mindi!!!! I bet the dance teachers love you for making it! How perfect is this!!! You are a talent! Wishing you a blessed new year buddy! Nicole xoxo
Awww…what a lovely and kind DIY. Perfect cubby for the dancers! Isn't fun to use our talent for others?! 🙂
Happy New Year!
It looks so professional!
Wow, what an amazing transformation!!! Great work and I bet the girls love it!! Found you through the Trash2Treasure challenge. Lisa
It's Lisa again..couldn't figure out the blogger user signing in stuff…they have changed things up! 🙂
…..and it's even on wheels!!! You rock. Pinning on the trash 2 treasure Tuesday board! Thanks for linking up your awesome sauce.
I just love to see before and after pictures. You did a great job on the cubby shelf. Thank you for sharing with the Clever Chicks Blog Hop! I hope you’ll join us again next week!
Cheers,
Kathy Shea Mormino
The Chicken Chick
http://www.The-Chicken-Chick.com
Wow! You have one serious spray painting station! Awesome! This cubby is totally amazing, love the back pack hooks on the ends.
Awesome…!!! Looks very nice and the paint is also very good. And all that dancers helps to increase the beauty. Great work and also thanks for sharing your idea.
What a labor of love–turned out great!
This is really amazing! I love that you added hooks on the ends to create even more space. Wonderful accomplishment!!!
Wow!! It looks so good!!! Wonderful job. You really put some passion and talent into it.
Thanks so much for linking to Monday party.
Hugs
Isabelle
http://www.lechateaudesfleurs.com
Wow, what a project, but so worth everything you did. The framing really did make a huge difference. Thanks for sharing at Vintage Inspiration Party.
OMG I need this! I just love curbside finds! I would love love love for you to hop over to my blog and link this gem up! This is my cup of tea and 80 year old barn wood is a must to any project lol. I use it quite frequently and even made my counter in my craft store out of it! Its beautiful!
Hope you have a chance to stop by! liverandomlysimple.com
Jess 🙂
The barnwood piece on top makes all the difference! What a nice revamp and I'm sure the dance studio will put it to good use!
I'd love it if you'd come link up with me and my 4 blogging friends at Talented Tuesday Link Party on my blog!
-Kristina B.
myownhomeblog.com
You did an amazing job on this renew but I have to say your wasting it on shoes if you let me have it I'll shabby chic it and fill with my collection of over 60 cake plates what do you think?lol Susie
I love this! I rarely see a cubby I wouldn't love to refurbish. Great job!
seriously so impressed. It's like you literally built a new one. Thanks for linking up to Outside [the Box}
Nicely done, Mindi. Looks GREAT! I love the step-by-step tutorial.
Thanks for sharing at the linky party,
<3 Christina @ I Gotta Create!
Oh my goodness, this turned out so beautifully! I know the dance studio will just love it 🙂 Thanks so much for sharing at Think and Make Thursday! 🙂
That is just amazing! What a transformation, such a lot of work but SO worth it.
Awesome transformation. Wow ~ what a lot of work; I'm so impressed with your carpentry skills. I would have given in when I hit all the tar. I have a small tool bin cubby in my garage as we speak that I still haven't attempted. Waiting for the burst of motivation to hit me. Right now it's turquoise; like "in your face" turquoise. Thanks for the inspiration, visiting you from Funky Junk 🙂
Great transformation! Have a great week!
What a great transformation! The decals are just perfect for the dance studio. Thanks for sharing it with SYC.
hugs,
Jann
Amazing transformation! I admire your vision for this project! What an undertaking! Thanks for sharing at my Creative Ways Link Party. Hope you'll be back again tonight!
Blessings,
Nici
Wow you did such an amazing job and I love that you saved this piece from the dumpster! Thanks so much for stopping by Creative Spark Link Party. Hope you stop by again today! http://bit.ly/1ybfEwi
I love it Mindi, what a gorgeous transformation! That hard work totally paid off, and I really love how the dark top contrasts with the rest of it in white! You were my Rockstar pick this week at the Creativity Unleashed link party, so I'm just dropping by to let you know! There are five Rockstars competing for Mega Rockstar of the week, and voting is now open, so stop by and cast your vote, and don't forget to tell your friends to vote for your project too. Good luck, and I hope you win! http://www.practicallyfunctional.com/creativity-unleashed-link-party/
back again just to share it some more 🙂 I cant get enough of this guy and I am so glad I featured it at Totally Terrific Tuesday!! Hope you made it back this week to link up! I cant wait to see everything!
Jess @liverandomlysimple
Again. This. Is. Amazing! You do such good work! This makes me want to go dumpster diving! Thanks for sharing your fantastic project!
Krista @reclaimrenewremodel