Family File System
When you have a large family it means you collect a TON of papers! I am always digging through paper piles to find the field trip form that is due today, the boys scout paper that says what I need to help them with, or the bill that has to be paid....
Sound familiar?
Well for me the clouds are parting... and I feel a sprouting feeling of freedom from paper piles...I have a new family filing system to help me stay sane!
Sound familiar?
Well for me the clouds are parting... and I feel a sprouting feeling of freedom from paper piles...I have a new family filing system to help me stay sane!
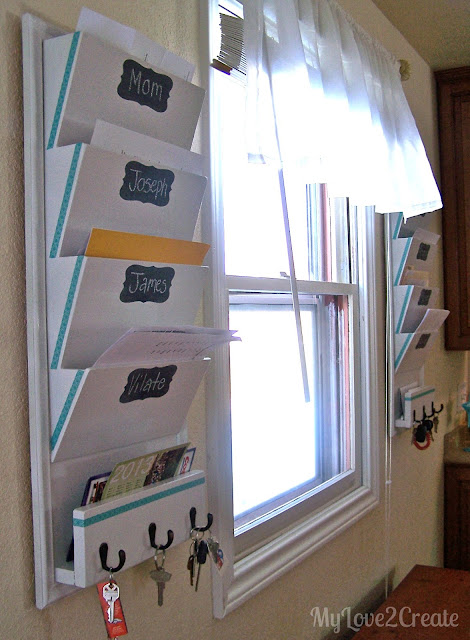
Here is a front view of both, sorry for the picture I had to close the blinds the blizzard we had left us with some glaring snow and all my pictures showing both at the same time are pretty bad.
This project has looked like the picture below for the past, hmmm, 7 months maybe? And the building was done probably a month before that!
My problem?
I couldn't decide where to hang them....seriously, that is why I haven't finished. It is truly pathetic.
It all started with a plan I saw on Ana White, you can view the plan Here. I loved it but wanted something a little bigger. That is when I noticed this Brag Post.
She had changed the plans a bit to make more file slots and I decided to change it even further.
Lets see how I did it, shall we...
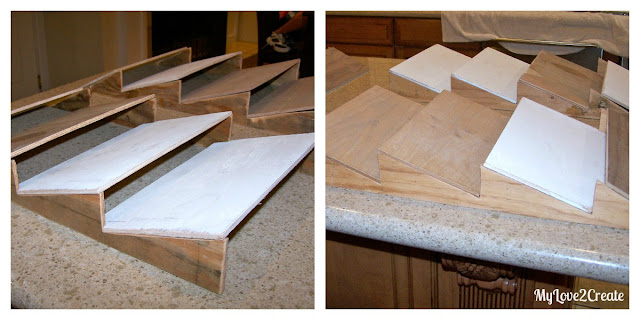
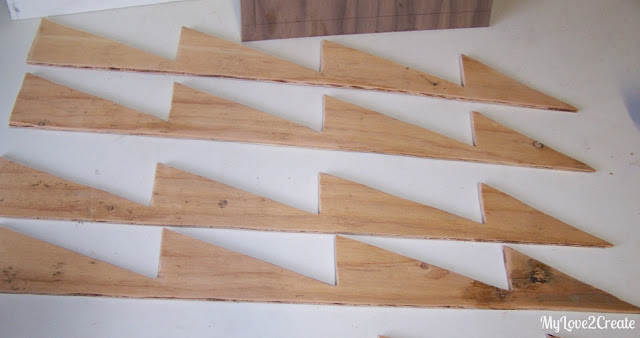
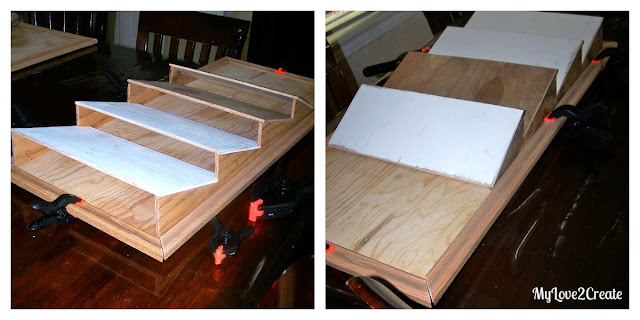
I decided to make two file systems. I cut 4 zig zag pieces, two for each system (the sides). I modified the plans so I would have 4 file slots on each system. *Update* I also made the paper slots wider than the plan called for if you look closely below in the picture, they were 7 inches high by 12 inches wide, that way I could put the papers in on their side!
Then I measured out all the front pieces and cut them with my sliding miter saw. If you notice I have several different pieces of wood. This whole project was made with free scrap wood I had collected.
Have you ever heard it pays to be a hoarder?...well it's true! I am living proof.
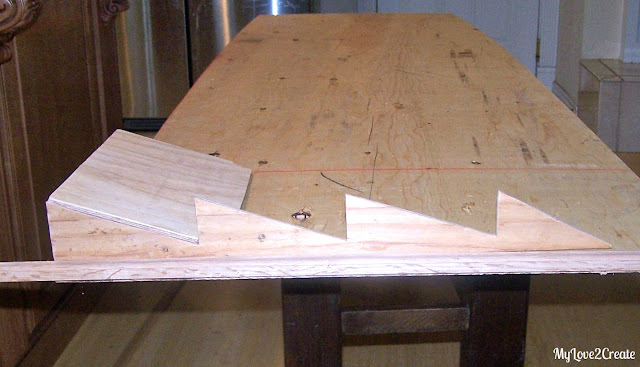
 With the pieces cut I set them on top of each other for a dry fit...It was coming together. Now I needed a back.
In the above picture I was getting measurements where to cut and also seeing if the moulding would work.
It looked good.
I took it out to cut with the jigsaw I had borrowed from my friend.
And since I needed two, I used the first cut to measure for the second.
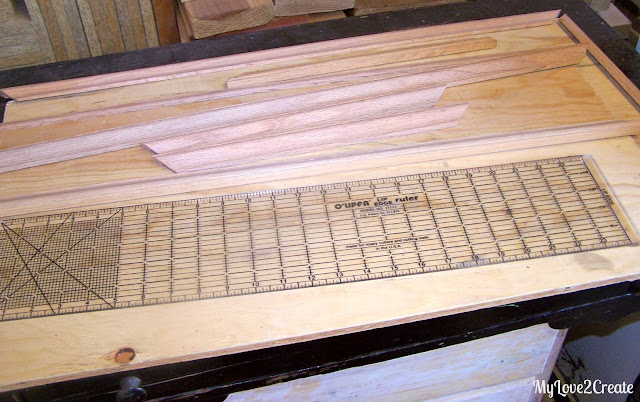
I put them out on the grass so I could measure my moulding cuts. I cut the corners at a 45 degree angle.
Here they are all cut. I then set them up for a dry fit to see if it would all go together...
The pieces were fitting just right.
This moulding had a lip on it so it sat right on the edge of the plywood perfectly. Sorry I am not sure what is is called, it was free in a pile of wood!
I glued and clamped down all the moulding pieces and let them dry.
I had to do one at a time, and I used all the clamps I have. I really need more clamps, but I am so grateful I at least had these!
The next step was glueing the side and front pieces on! Do you like my methods! I am a "use what I have" kind of girl so....
You have to get kind of creative. I glued two front pieces on first then finished with the last two.
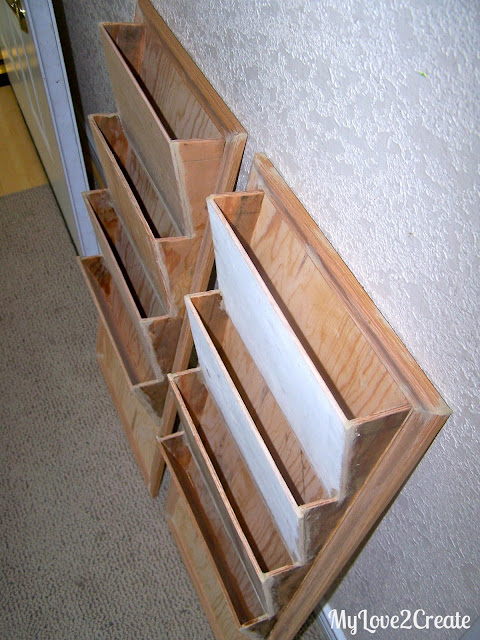
I ended up with this! You can see I filled in all cracks with wood filler.
They were looking so cute!
I wanted some slide in mail slots like the brag post, so I found a scrap 1x2 and 1x4 and cut them to size.

I drilled pocket holes in the 1x2's...
Then I glued and screwed them onto the very bottom of each board.
I added the 1x4 with glue and screws, I always pre-drill my holes. Then finished off with wood filler, and sanded smooth!
They were ready to be finished! I used spray paint because I had it on hand and it was easier than with a brush.
That brings us back to this shot. I wasn't sure if I liked just plain white and didn't know where to hang them. So they have been sitting around making me annoyed that I was such a slacker...for far too long!
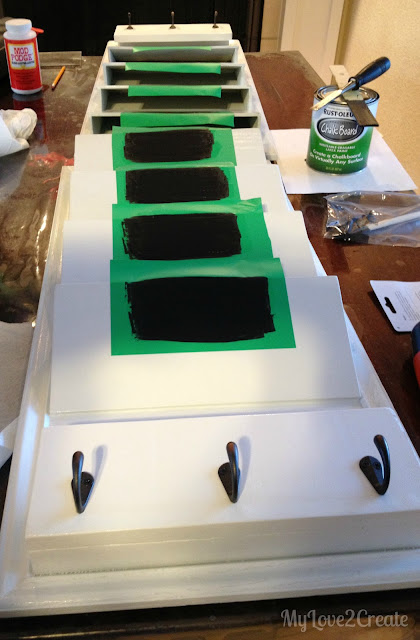
This past weekend I decided to take the plunge and finish. I cut some labels and sealed them with mod podge.
Then I added three coats of chalk board paint. When the last coat was still wet I removed the stencil. I found the best way to do this is to pull or pop off the stencil by pulling straight out, not up.
I added the hooks and was liking them so much more, but they still lacked....something...
A quick run to the new Michaels store and I had my remedy in hand.
Washi Tape!
It added a pop of color and it is totally changeable! If I want a different look I can just take it off. I love it! My husband even commented on how much better they looked when I added..."What is that?"
I used the smallest dab of glue stick to the ends of each piece of washi tape to prevent it from coming up. It worked perfect.
I guess I should confess that part of the reason these took so long to hang is because my husband and I had different ideas of where they should go. He eventually gave in and hung them where I wanted, and...here is my secret, I had him help me hang them up and ta da...he now had "ownership" and suddenly they were looking pretty good...(shhh don't tell him!)
Didn't he do a good job?
Ahhh, life is good!
And my huge pile of papers....GONE!
Why didn't I do this months ago?
Thanks so much!
Mindi
I will be linking to these parties.













30 comments
Ok these are wonderful!!! I would so be organized too!! Love them!!! I wish you lived closer...I would pay you to help me make a privacy lattice screen for my garden!!! I will jump over to vote for you now!!! And how many kids do u have!?!? Great work lady!!!
ReplyDeletethose came out really good!love all the details you put into your projects!
ReplyDeleteHoly cow! These are gorgeous!!! And they totally seem efficient for sorting household papers in :) Incredible job!
ReplyDeletexo
summer
What an amazing project...well done! Stopping by from making the world cuter :)
ReplyDeleteOooh and newest follower to boot
ReplyDeleteI love this! The combination of chalkboard paint and washi tape is perfection! I host a DIY link party every Monday and would love for you to join! http://homecomingmn.blogspot.com/2013/02/the-diyers-link-party.html
ReplyDeleteMindi!!!! These look so freakin' awesome. Good call on the washi tape. Love the chalk board painted labels. I am glad you hung them where you did. The perfect spot.
ReplyDeleteawesome! love being organized and not having stuff all over the table!
ReplyDeletewow, impressive that you built them yourself!
ReplyDeleteThese are terrific! I love the added touch with the tape. Great tutorial too! I'd love it if you would share this at "What We Accomplished Wednesday," at Green Willow Pond. It is live right now. Have a great week!
ReplyDeleteHugs,
Deborah
I LOVE this!! I just purchased a black one at Homegoods. Yours are MUCH CUTER!! I am your newest blog follower. Come visit me sometime too. :)
ReplyDeletewww.jenniferinteriors.net
Love this! Looks really neat :-)
ReplyDeleteWhat a great project! I love the chalk and the tape details!
ReplyDeleteI just started a new link party and would love for you to come over and share your post or any social media sites. Talkin’ About Thursday http://designeddecor.com/talkin-thursday-link-party-9/
DeDe@DesignedDecor
This is great! I spent today painting an old mail organiser too! :) Funny to stumble upon your post. Well done!
ReplyDeleteYou totally just saved my organizing dilemma! I could not find anything I like and all the premade letter bins are WAY too deep. Now I can do this myself-or have my dad do it since I don't have any power tools. These turned out amazing and I can customize them into something Farmhouse looking. Great tutorial!
ReplyDeleteWhat a great idea... papers are the worst! I am the queen of chucking stuff my kids needed so this would really help! I hope you'll come ans share at my Super Saturday Show & Tell today :) http://www.whatscookingwithruthie.com xoxo~ Ruthie
ReplyDeleteThat is so awesome!!! I want one!!!
ReplyDeleteI love that you made them--they turned out awesome! And I hate when I can't figure out where I want something to go too :) Thanks for sharing at point of view!
ReplyDeleteYou've got some serious skills Mindi! Awesome! I always wanted these but never wanted to pay for them from a store! ha ha! I am pinning this!
ReplyDeleteI just love this project! I am a new follower!
ReplyDeleteI just saw these at House of Hepworths. I love them! And you definitely added the right finishing touches! :)
ReplyDeleteHi Mindi
ReplyDeleteI'm here from HOH. What a great organizer! Can't believe you made it from scratch. Love your chalkboard label and hook touches. I'm a new follower and look forward to catching up on your posts. If you get a chance, would love for you to visit me at altered-artworks.blogspot.com and say hello.
Doreen
http://pinterest.com/dozeedo/
Your organizer turned out amazing. I need to get more organized you've inspired me. Thanks for sharing & linking up! @ DearCreatives.com
ReplyDeleteReally eye-catching! Great work! Here from O&DE. :)
ReplyDeleteThis is a great idea. I always have piles of papers laying around that I'm never quite sure where to put them. Thank you so much for sharing with Saturday Spotlight last week. I hope you come by tomorrow to share more of your awesome creations!
ReplyDeletehttp://angelshomestead.com/
April
Mindi, this is a super AWESOME project! I like your "methods" :) I stole from my husband two sand bags (they are now mine), I use them all around, but sometimes I need more than two, then I have to do just the same you did!
ReplyDeleteThe tags are the perfect final touch! I love them!
I'm here from HOH and clicked over to see your file system because it looked very familiar. Well, it's MY brag post you used from Ana White! Great job! They look fantastic. ;)
ReplyDeletePapers are everywhere, and it's never easy to organize them all at the same time! Good thing you decided to make this file organizer - a very personal one; each member has assigned folder. I just hope that wind will not blow each paper and scatter around your house.
ReplyDelete-Ruby Badcoe @ WilliamsDataManagement
I have been searching everywhere for something JUST like this! Would you mind sharing the measurements so I can tell my husband exactly what I need cut? THANK YOU!
ReplyDelete-Erin Winger
Hi Erin! I hope you get this, you are a no reply blogger so I couldn't reply by email, sorry! I am so glad you want to make one! If you go to the original plan I made these from you can print out the template, I just made it twice as long to get the four bins. Hopefully that helps! Let me know if you have further questions! Here is the link: http://ana-white.com/2011/08/pb-inspired-daily-system-letter-bin
DeleteYour comments make me smile! I love to hear what you think!